Archive | Dessert RSS feed for this section

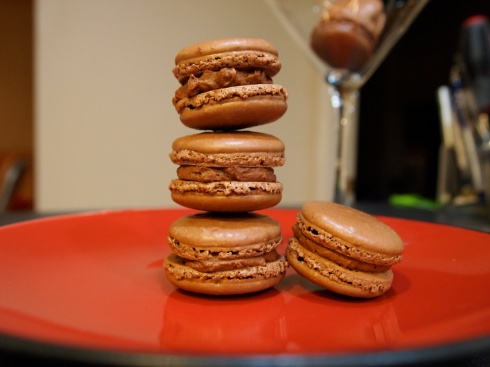
Chocolate Nutella Macarons

11 Feb

Guys! I’ve missed you, I really have.

But after the immense success I had in my kitchen tonight, I had to share it with you. I’ve been wanting to try making macarons for a long time, but it seemed so intimidating. Instead, I’d pay out the nose for mediocre macarons from the French bakery. And then a few weeks ago, the only bakery near me that made reasonably priced and delicious macarons closed. It was tragic.

I asked for a couple things for Christmas so that I could finally try my hand at macarons. I got new air-bake baking sheets, I got a digital kitchen scale, and I got a piping bag. With supplies in hand, I knew it was my time.

Some people spend their Friday night out on the town…I went for an hour long jog down to the National Mall and back and then donned my Scripps sweatpants and sweatshirt and got down to business. I was fully prepared for complete failure.

After I had folded in the dry ingredients…things were looking funky. It seemed too thick, kind of lumpy…but I decided to just go with it. Amazingly, as I piped it out, it settled into perfectly smooth rounds. To get them the same size, I counted quickly to five while squeezing the piping bag. I let them sit while I heated up some frozen lasagna and watched Big Love. Then, it was the moment of truth.

When I opened the oven and pulled these out, I literally spent the next five minutes doing a really ridiculous dance around my kitchen. It went something like this “punch punch punch kick kick punch punch kick punch kick kick jump clap cap jump kick punch punch punch.” Pulling a sheet of macarons out of the oven and realizing they have perfect feet and look exactly like the pictures you see makes you feel LIKE A GOD.

Also, I’d like to state for the record that I did not age my egg whites ONE SECOND. I let them come to room temperature for about 10 minutes before using them. Seriously, don’t waste your time. I think the French just made up a bunch of unnecessary steps and rules for making macarons so that we Americans don’t realize that we, too, can have access to these delicious treats.

My boyfriend and I then proceeded to eat half the batch…(oh yeah…this blog’s name is no longer completely accurate…but I still mark “single” on tax forms, so roll with it). Happy early Valentine’s Day!

Chocolate Nutella Macarons
Makes 16

Print this recipe!

Adapted from Live, Bake, Love and Cake & Allie

Macarons
1 cup (100g) powdered sugar
1/2 cup (50g) slivered, blanched almonds
3 Tbsp (25g) unsweetened cocoa powder
2 large egg whites at room temp
5 Tbsp (65 g) granulated sugar

Use the weights! Macarons are about precision, so while there are cups and tablespoons listed, I HIGHLY recommend getting a kitchen scale for these.

Line two cookie sheets with parchment paper and prepare your piping bag with a fairly large, plain tip.

In a food processor, grind the slivered almonds until they are are halfway to almond flour (you don’t want to go too far and accidentally end up with almond butter…). Add the powdered sugar and cocoa powder to the almonds in the food processor and grind until powdery. Set aside.

In an electric mixer, whisk the egg whites until they are foamy. With the whisk still running, slowly SLOWLY add the granulated sugar. Continue to mix until your egg whites are glossy and stiff.

Add half your dry ingredients and fold in using a rubber spatula. You don’t have to worry as much about deflating your egg whites here, you want to really incorporate everything well. One the first half is mostly mixed in, add the second half and continue folding. Things are going to seem dicey, you’re going to worry if you’ve ruined everything, just keep folding. You’ll end up folding upwards of 40-50 times to get things fully incorporated.

As you’re folding, you want to keep looking to see if when you drop some of the batter on top of the rest, does is slowly melt back into the whole? That’s what you’re going for. Transfer the batter to your piping bag.

Pipe quarter-sized rounds onto your baking sheet, an inch apart. Bang your cookie sheets flat on the counter a couple times to help them settle.

Let sit for 30 minutes, or until you can lightly touch the tops of the macaron without it sticking to your finger. While they are resting, preheat oven to 300. Bake for 9-11 minutes.
Let cool completely and then pair up the macarons with a mate who is a similar size. (Unless you are perfect and all your macarons came out exactly the same size. Good for you. I’m not that talented.)

Nutella Ganache
½ cup whipping cream
2 oz bittersweet or semi-sweet chocolate, chopped into small pieces
3 Tbsp nutella

Place chocolate and nutella in a heat-proof bowl. In a small saucepan, heat whipping cream to a simmer.

Pour whipping cream over chocolate and nutella and let sit for 30 seconds to melt. Mix together until fully combined. Put ganache in the fridge to firm up (but it should still be pourable).

With an electic mixer, whip ganach for 1 minute until fluffy and lighter in color. You can use a piping bag for this step, but it’s not necessary. Spoon a small dollop of ganache onto middle of the bottom of one macaron and gently press the top down to squeeze ganache just to the edge of the cookies. Repeat with all your pairs.

Let macarons sit in the fridge for at least 30 minutes for ganache to firm up. (Apparently they get better over 24 hours, but I wouldn’t know, mine didn’t last that long).

Store macarons in the fridge and let come to room temperature before devouring for best flavor and texture.

Bourbon Pumpkin Bars

20 Oct

It’s mid-October, guys. When did that happen? Summer can’t be over yet. I didn’t get in that one last trip to the beach I was hoping for. I never really evened out that awkward shorts tan line I got while kayaking. I still have some sweet tea vodka I need to drink. Wait. Strawberry season is over? Autumn, we need to talk. I love you and all, but I’m not okay with this.

We’ve moving into pumpkin season. I’m gonna try to embrace it full on. But I need to add a little bourbon to get me through this. Makers. Can’t go wrong. There’s a reason Rocky Votolato named an album after it. (A great album, BTW).

Autumn does involve some pretty great things. I went apple picking a few weekends ago in Maryland, there was a cow involved. And of course, whenever I told anyone I went apple picking, the first words out of their mouth were “are you going to make apple pie??” I resisted at first, but eventually caved. I made Joy the Baker’s amazing apple pie, and highly highly highly recommend it. It was phenomenal.

The leaves are starting to change colors here in the mid-Atlantic, so I’m planning to go hiking next weekend to admire the foliage. That was one thing I always missed while I was living in Southern California. The leaves would just one day kind of die and fall off the non-native tress on campus. Nothing like the brilliant reds and oranges and yellows you can get in places that actually have seasons.

Have you figured out what you’re going to be for Halloween? I’m going to put in my bets on top costume choices this year:

  1. Zombie bin Laden
  2. Occupy Wall Street protester
  3. The Arab Spring
  4. Hurricane Irene
  5. Lady Gaga (duh, who doesn’t want another excuse to wear that meat dress?)
How does one dress up like The Arab Spring, you ask? I don’t know. A turban and some flowers? It’s interpretive.

I’m pretty excited about my own costume choice this year. It was largely based around the haircut I got in June. Click here for a hint: (This isn’t me coming out. I’m still into dudes.) I’ve got some black skinny jeans, a purple hoodie, black jacket to go over the hoodie, and I need to procure some ridiculous looking sunglasses from the dude who sells them for $3 by the Metro.

But while we’re talking about Halloween, let’s talk pumpkin. More specifically, pumpkin and bourbon. This is a combination I hadn’t thought of until I made these bars, but it makes so much sense. Also, fancy a glass of Makers on the rocks while you bake? Then let’s be friends.

You’ll notice that I’ve added in a “Print this recipe!” button in the recipe. A reader asked, so I finally got around to figuring it out. It wasn’t really that hard! If you have any trouble with it, let me know in the comments. I’ll slowly be going back to add in the print option to older posts, but it might take me a bit. Bear with me!

Bourbon Pumpkin Bars

Makes 24

Inspired by Two Peas and Their Pod

Print this recipe!

2 cups flour
3/4 tsp cinnamon
1/4 tsp nutmeg
1 tsp baking soda
3/4 tsp salt
1 cup (2 sticks) butter, room temperature
1 cup granulated sugar
1/4 cup brown sugar
1 large egg
1 tsp vanilla extract
4 Tbsp bourbon
3/4 cup pumpkin puree
12 oz semi-sweet chocolate chips

Preheat oven to 350 degrees.

Grease a 9-by-13-inch baking pan and set aside. In a medium bowl, whisk together flour, nutmeg, cinnamon, baking soda, and salt and set aside.

With an electric mixer, cream butter and sugar until smooth. Add egg, vanilla and bourbon and mix until combined. Add pumpkin and mix well. It will look kind of weird but just move on. Add dry ingredients and mix on low until just combined. Taste test. Taste test again. Using a wooden spoon, stir in chocolate chips.

Spread batter evenly in the pan and bake for 35 minutes, until a toothpick inserted in the middle comes out with crumbs. Cool bars in pan. When cool, cut into squares and enjoy!

Blackberry Lemonade

27 Jun

Wow. Things have been busy, huh? June just kind of disappeared on me there. My focus was so much on starting the new job that the first 20 days of the month just whizzed by, and then the new job started, so I’m trying to re-adjust to a 9-5 life again.

But things happened in June. I know they did. Let’s see…in June, I:

1. Finally finished unpacking at my new apartment.

2. Watched a sweet short dance film made by my sister.

3. Watched the Cardinals lose two awful games against the Nats (swept by the Nats?? Really, Cardinals?? Pull it together.)

4. Bought tickets to see the midnight showing of Harry Potter. Yeah, that is happening. I’ve never done it before, I figured I needed to fully commit to this last movie.

5. Got assaulted by a glitter-covered friend at the Pride Parade (but didn’t get punched in the face by him this year…unlike last year.)

6. Cut off all my hair. That was a big one.

7. Watched my new boss get sworn into her position. And then got sworn in myself when I started work the next Monday.

8. Got caught in a crazy rainstorm on my way to hear some Jazz in the Park, complete with a great rainbow.

9. Went tubing for the first time ever. And planned to make some amazing blackberry lemonade to take with me down the river. But then got inexplicably ill the morning of the tubing adventure and barely made it out of bed in time to catch the bus to West Virginia. So instead I made the blackberry lemonade the next day. It was still pretty great. The fruit flies in my apartment loved it.

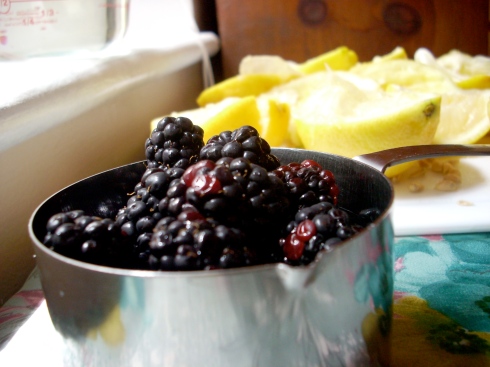
No lemons were harmed in the making of this post. Well, okay, maybe a few lemons. Their sacrifice was worth it.

I’m still trying to figure out the best way to bake/cook/take pictures in my new apartment. There aren’t windows in my kitchen. It’s sort of a problem.

Blackberry Lemonade
Adapted from Food Network Magazine
Serves 4

Print this recipe!

Simple Syrup:
¾ cup granulated sugar
¾ cup water

Lemonade:
1 cup fresh squeezed lemon juice
1 cup simple syrup
1 cup blackberries
1 cup water
ice cubes

Stir together ¾ cup water and ¾ cup sugar in a medium saucepan and bring to a boil, stirring to dissolve all the sugar. Remove from heat and let cool. There’s a reason it’s called simple syrup, people.

In a pitcher (or bowl, if you actually don’t own a pitcher at this point in your life…) muddle together blackberries and simple syrup. I used the back of a wooden spoon. (If you want to use a little less simple syrup to start and check on the sweetness level as you go, I felt like a full cup was a little too sweet. Just depends on how you like your lemonade though.) Stir in 1 cup water and 1 cup fresh lemon juice. Add ice and serve, preferably whilst floating down a river. I won’t tell anyone if you add a little vodka to it…

Mixed Berry Mini-Cobblers

16 May

Whew. I finally feel like I’m settling back into a normal routine. I’m working about 5 shifts a week at the restaurant. And now I have more free time since I don’t have to spend my days job hunting. I was originally supposed to start my new job at the end of May, but it looks like it might be more like mid-June, due to slow going paper work. Thanks, Federal Government.

I took advantage of one of my days off last week to make a nice dinner for a boy. When I told him I was going to cook dinner, we had a conversation that went something like this:

Me: “Want to come over for dinner? I’ll cook!”

Him: “Sure, or we can just go out and grab a bite somewhere.”

Me: “No, I’ll make dinner!”

Him: “But I feel bad making you cook for me.”

Me: “No no no. I love to cook, I want to make dinner.”

Him: “You don’t have to cook for me, really.”

Me: “No. I am cooking. I love to cook. I want to cook. Let me cook, for the love of god.”

See, this is the problem: men think that women in the kitchen = anti-feminist. False. Denying me the thing that I love to do would be anti-feminist. When people come over and let me cook for them, I consider it them doing me a favor.

And here’s the other thing. I know that when I cook you dinner, you feel like you should do the dishes as a thank you. But see, I secretly don’t want you to, because I’m worried you’ll break something, and won’t get my dishes as clean as I want them. Yeah, I’m a perfectionist and a control-freak in the kitchen. This is just how I am. Instead, you should probably just take me out to my favorite restaurant sometime.

Anyway, for dinner we had my favorite homemade tomato sauce over fettuccine, and these awesome little cobblers for dessert.

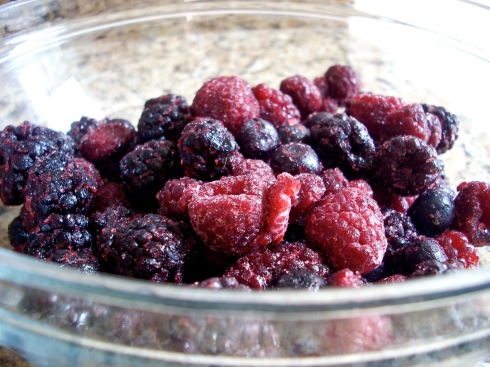
In my opinion, frozen berries work just fine in a recipe like this. But if you want to splurge on fresh, more power to ya!

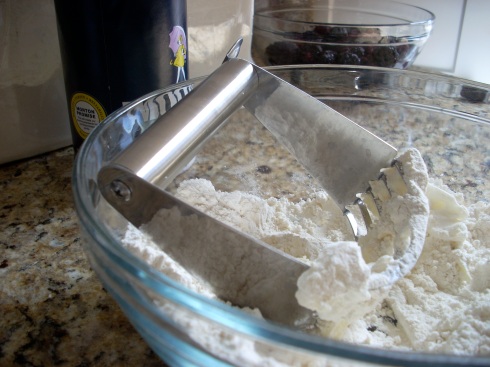
I know I’ve talked about how I usually use my hands when I mix together a biscuit dough, this time I used my fancy little Williams Sonoma pastry cutter. Just because.

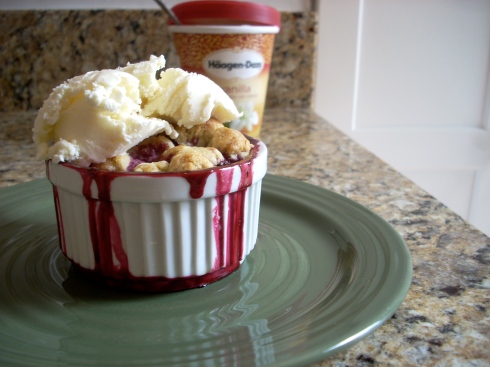
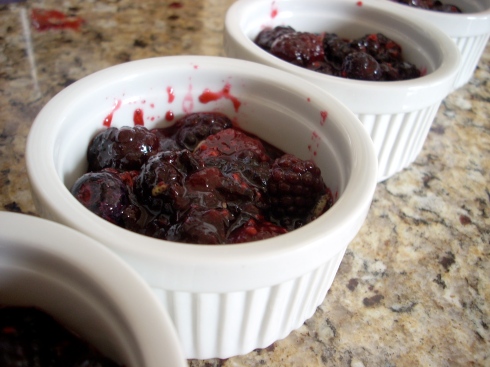
So. Let’s talk cobbler theory for a minute. There are cakey cobblers out there, which are also delicious. But this cobbler has a biscuity topping, it’s not very sweet, but it’s by far my favorite. And while you could make this as one big cobbler and scoop out servings, I think it’s fun to have individual servings in cute little ramekins. Plus, when you put a big scoop of vanilla ice cream on top, it melts down into the cobbler to create a heavenly mixture of creaminess and fruitiness. Life changing.

Also: in case you don’t want to share these, here’s what I suggest. Mix up the berry filling and divide it between four ramekins. Cover with plastic wrap and store in the fridge until you want to eat them. Then put the dough in a plastic bag and put in the fridge. When you want a cobbler, pull out one ramekin, top it with the dough, and pop it in the oven. Repeat. Repeat again. Repeat one more time. Crap, now you’re out of cobbler, better make some more.

See what I mean about the melding of creamy and fruity? My mouth is watering.

Going…going….

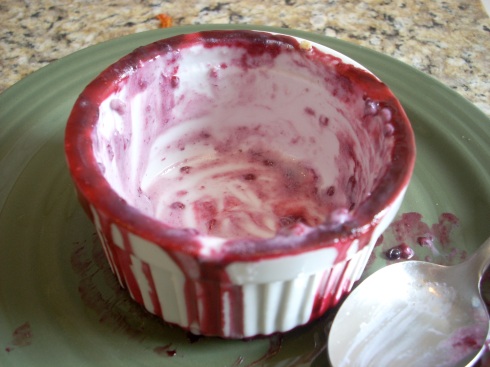
Gone.

Mixed Berry Mini Cobblers
Inspired by Pioneer Woman
Serves 4

Print this recipe!

3 cups fresh or frozen mixed berries (black berries, raspberries, blueberries)
1/4 cups plus 3 Tbps sugar
1 Tbsp corn starch
1/2 Tbsp lemon juice
1/4 whole zest of lemon

1 cup flour
1/8 tsp salt
1 1/2 tsp baking powder
2 Tbsp vegetable shortening
2 Tbsp butter
1 egg yolk
1/4 cups milk

2 cups vanilla ice cream

Preheat oven to 425 degrees. Combine blackberries, 1/4 cup sugar, corn starch, lemon juice, and lemon zest in a mixing bowl. Divide equally among four 1-cup ramekins or other small oven-proof serving dishes.

In a medium bowl, mix together flour, salt, baking powder, and 1/2 tablespoon sugar. Cut in shortening and butter with pastry cutter or your hands until the mixture is coarse. Pour 1/4 cup milk into a large measuring cup, add the egg yolk, and mix together. Pour into flour mixture, stirring as you go. Mixture should be smooth and not dry, but not too sticky. Try not to over mix.

Pull off clumps of dough and place them on top of the berries. No need to be uniform here. Lightly flatten dough with your fingertips and sprinkle with 2 to 3 tablespoons of sugar. Bake until golden for 20 minutes. Let cool for a few minutes so no one burns their hands. Then top with ½ cup vanilla ice cream for each dish and enjoy!

Chocolate Chip Banana Bread

19 Apr

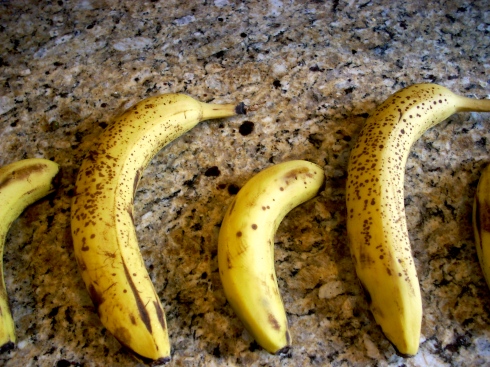
So here’s what happened. I bought some bananas at the store over the weekend. But they were absurdly large bananas. Bananas of unusual size. I ended up only eating one of them (and even then, I ate half of it one day and half the next). I’m talking really big bananas, people. That means I had two very large bananas in my pantry that were quickly getting beyond ripe.

And when you have bananas that are beyond ripe, you make banana bread. It’s one of the principle laws of the universe.

Of course, my two very large bananas weren’t quite enough for my banana bread recipe, so I had to go out and buy some supplementary bananas. And I was amused to find that the ripest bananas they had at the store happened to be exceptionally small. I decided that two very large bananas + two very small bananas = 4 normal bananas. And that, my friends, is banana math.

For me, plain banana bread is nothing special. But if you add chocolate chips? Magic. I also decided to throw in a little whole wheat flour so I could pretend this is an acceptable breakfast food. (If you don’t have whole wheat flour on hand, just go ahead and use 2 cups of all-purpose flour.)

Oh yeah, and you may have noticed my counters are looking quite different. While I was in Illinois, my landlord ripped out the old counters and replaced them with nice granite ones. This would be way more exciting if I weren’t moving out in a month.

Chocolate Chip Banana Bread
Makes 1 9×5 loaf

1 ½ cup all-purpose flour
½ cup whole wheat flour
2 ½ tsp baking powder
¼ tsp salt
½ cup semi-sweet chocolate, chopped finely
1 tsp vanilla extract
½ cup granulated sugar
½ cup packed brown sugar
2 large eggs
4 large ripe bananas

Preheat the oven to 400 degrees. Grease a 9×5 loaf pan and set aside.

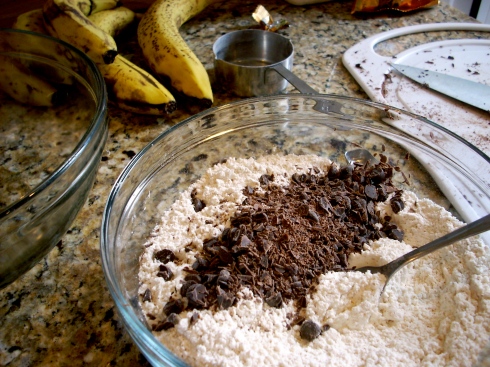
In a medium sized bowl, mix together flours, baking powder and salt. Stir in chopped chocolate.

In a large bowl, mash up the bananas. Add granulated sugar, brown sugar, eggs, and vanilla and stir until combined.

Add dry ingredients and mix until just combined, being careful not to over mix.

Pour batter into prepared pan and bake for 45 minutes or until golden brown.

Chocolate and Strawberries Cake

14 Mar

I ran my 8K yesterday! I was actually pretty nervous before it started. What if I hurt my ankle part way through? What if I couldn’t run the whole way? What if I tripped and fell and everyone behind me ran me over? What if I really had to pee during the race? I mean, I had to drink a bunch of water the 24 hours beforehand so that I’d stay hydrated. I have a small bladder. Do I just dart into a Starbucks? This was by far my biggest concern. Luckily, I made it all the way without any problems.

My final time was 49.36, which was pretty much exactly what I was expecting. I didn’t have any major goals since it was my first race, I just really wanted to be able to run the whole way. And that goal was achieved! My friend and I ran most of the way together, which really helped keep us both on pace. But the last mile she was feeling mostly spent, and I was getting a burst of energy, so I went ahead and was waiting to give her high fives at the finish line.

I used to hate running so much, but this was by far one of the most fun things I’ve done this year. It was just amazing. The route was gorgeous, we started right by the White House and ran down Pennsylvania Avenue towards the Capitol. Then we went up to Union Station, back south running right beside the Capitol, down into a less scenic part of the city, then back up and ran down the Mall, and then back onto Pennsylvania toward the White House to finish where we started. The crowd was huge, it was so much easier to run when surrounded by all that energy and excitement. And when you finish, there are lots of people lining the street cheering you on as you run under the big balloon arch. And then they give you free food to refuel!

I already excited to find another race to do. I’m thinking maybe a 5K, or I’d love to do 8 again, but I’m not sure I’m ready for 10 yet. I’d like to improve my pace at the shorter distance first. I think my goal will be to get down to a 9 minute mile next time.

For me, one of the best parts about running a race was that for the rest of the day, I felt totally justified in eating whatever I wanted. So I may have had two slices of this cake. And some pad thai, and a few cookies my roommate made, on top of the big brunch I had with my friends after we ran, at which mimosas were drunk.

Strawberries are my second favorite berry, right behind raspberries.

The idea for this cake came from a good friend from college, who was in DC this weekend to interview at a med school.

I said I’d make a cake while she was here, and she wanted something that was like a cheesecake brownie. So I settled on a rich chocolate cake, cream cheese frosting, and for good measure, some mashed up strawberries.

Because this is a chocolate cake with a white frosting, you pretty much have to do a crumb layer of icing, or risk a very speckled frosting. This is pretty much the ugly duckling of cakes right now. But it gets better, I promise.

Oh yeah, and because we are super classy, we had pink cocktails served in my Scripps martini glasses.

Chocolate and Strawberries Cake

Cake recipe from Bon Appetit, Frosting from Pioneer Woman

Cake:
½ cup natural unsweetened cocoa powder
2 oz semisweet or bittersweet chocolate (do not exceed 61% cacao), chopped
½ cup boiling water
½ cup buttermilk
1 1/3 cup cake flour
1 tsp baking soda
½ tsp salt
1 1/3 cups packed brown sugar
½ cup (1 stick) unsalted butter, room temperature
2 large eggs
1 tsp vanilla extract

Position rack in center of your oven and preheat to 350 degrees. Grease two 8” cake pans, lining the bottom of the pans with parchment paper and greasing that as well.

Combine cocoa powder and semisweet chocolate in a medium bowl. Pour ½ cup boiling water over cocoa powder and chocolate and whisk until smooth. Whisk in buttermilk. Set mixture aside.

Whisk flour, baking soda, and salt in another medium bowl. In an electric mixer, beat brown sugar and butter in a large bowl until well blended. Add eggs and vanilla and beat until light and creamy. Beat in dry ingredients and chocolate mixture.

Transfer to prepared pans, dividing equally. Bake until a tester comes out clean 20-25 minutes. Cool cakes in pans for 15 minutes, then cut around pan sides to loosen cakes before turning out onto racks. Peel off parchment paper and cool completely.

Icing:
½ pound cream cheese, room temperature
2 sticks unsalted butter
1 ½ pounds powdered sugar, sifted
1 tsp vanilla
dash of salt

2 lbs strawberries
6 tbsp granulated sugar

Reserve a few strawberries for garnish if you’d like. Stem strawberries and slice them in half. Place in a bowl and sprinkle with 4 tbsp granulated sugar. Stir together and let sit for 30 minutes. Divide the strawberries in half and mash up with a fork (you don’t have to make it a pulp, you can leave some pieces mostly whole). Sprinkle each bowl with 1 tbsp sugar and let sit for another 30 minutes.

Combine cream cheese, butter, powdered sugar, vanilla and a dash of salt in a mixing bowl and mix until light and fluffy.

To assemble:
Place one layer of chocolate cake on serving platter or plate. Top with half of the mashed strawberries. Spread a little less than 1/3 of the icing over the strawberries. Place second layer on top. Put the rest of the strawberries on top of the cake. Add half of the remaining icing and spread over strawberries. Use the remaining frosting to ice the sides of the cake. If you kept some strawberries whole, you can slice them and use to garnish the cake.

Store cake in the fridge and serve slightly chilled.

Chocolate Crinkle Cookies

11 Mar

It’s been a big week around these parts. My 8k is this weekend, on Sunday morning, so I got in my last few runs before the big day. A good friend of mine from college is going to be in town this weekend, so I get to see her tonight for dinner. I had a great date with one of the guys I met at speed dating (and might be seeing him again next week, fingers crossed.) And I had a phone interview for a job that would require me to move away from DC. Who knows if I’ll get the job, but it’s been a week of wondering if I got the job, could make myself leave DC?

The job is in St. Louis, and I’ve been starting to think about moving back to the Midwest, so it could turn out to be a great opportunity. But I don’t want to put too much worry or hope into that yet. So instead, I’ll distract myself with my favorite cookies.

Whenever I go home to Illinois, I always try to make it to the Garlic Press Cafe for lunch. They have really great sandwiches (I always get the chicken caeser sandwich), and yummy side dishes that are more inventive than most of the food you can find in central Illinois. And then there are the chocolate crinkle cookies. So gooey and chocolatey. I could eat them all day, every day.

Since I only get home a few times a year, I needed to figure out how to make my own chocolate crinkle cookies. These guys here are a pretty good substitute, you just have to be sure not to overbake them so that you get that great fudgy center. They require a few more steps than your normal cookie recipe, but the end result is so pretty and delicious that it is definitely worth it.

Chocolate Crinkle Cookies
Adapted from Martha Stewart

Makes 2 dozen

2/3 cup bittersweet baking chips
½ cup plus 2 tbsp flour
¼ cup dutch cocoa powder  *see note
1 tsp baking powder
1/8 tsp salt
4 tbsp butter
2/3 cup brown sugar
1 egg
½ tsp vanilla
3 tbsp milk
½ cup confectioners sugar

*If you don’t have dutch process cocoa powder, just take 1/4 cup natural cocoa powder and mix in a pinch of baking soda (about 1/8 tsp).

Preheat oven to 350 degrees. Put bittersweet baking chips in a microwave safe bowl and microwave until glossy, then stir to finish melting. Set aside to cool.

Sift together flour, cocoa, baking powder, and salt. In the bowl of a heavy-duty electric mixer fitted with the paddle attachment, beat butter and brown sugar until light and fluffy. Add eggs and vanilla, and beat until well combined. Add melted chocolate.

With mixer on low speed, alternate adding dry ingredients and milk until just combined. Divide the dough in half, wrap in wax paper, and chill in the refrigerator until firm, about 2 hours.

On a clean countertop, roll each portion of dough into a log approximately 1 inch in diameter, using confectioners’ sugar on your hands and rolling surface to prevent sticking. Wrap logs in wax paper, and chill for 30 minutes. Cut each log into 1-inch pieces (you can get about 12 pieces per log), and toss in confectioners’ sugar, using your hands to roll the pieces into a ball shape. Toss in confectioners’ sugar once more to completely coat. Place the cookies 2 inches apart on a greased baking sheet. Bake until cookies have flattened and the sugar splits, 12 to 15 minutes.

Transfer from oven to a wire rack to let cool completely. Store in an airtight container for up to 1 week.

Orange Chocolate Pudding

19 Feb

It was 75 degrees in DC yesterday. I took a jog down to the National Mall to the Lincoln Memorial and back. Then I sat out on my back deck in my swim suit, read Glamour, and ate lunch in the sun. In the afternoon, I went over to a friend’s apartment, and we sat up on the roof of the building drinking beer. Unfortunately, this amazing weather is not here to stay just yet. I think we have to go back to winter for a few more weeks until I can really have spring and summer.

But since we got just a little taste of summer, I got to thinking about the best ice cream I’ve ever eaten. Well, to be fair, the best ice cream I’ve ever eaten was probably in Buenos Aires, Argentina. But the best ice cream I’ve eaten in the United States was at a cute little shop in Old Town Alexandria, VA, down by the waterfront. The flavor: Orange Chocolate. It’s like those weird balls of chocolate that are orange flavored and come in segments. Do you know what I’m talking about?

Anyway, this ice cream is amazing. It’s the only flavor I ever want to order when I go there. I used to live in Alexandria, so I got to eat this great ice cream pretty frequently. But now it’s a good 45 minutes to get out there, so I haven’t had it in a really long time.

But then I got to thinking that I could make orange chocolate pudding, and it would probably be very similar! I just took a chocolate pudding recipe I already knew I liked, and incorporated orange zest to give it that extra punch. Plus, orange zest sugar smells amazing. I want to use it in everything I make. But that would be gross. Instead, I’ll just play with my sugar and make shapes with it.

Orange Chocolate Pudding

Adapted from Smitten Kitchen

Makes 3 servings

1/4 cup sugar
zest from half an orange (about 1 tbsp)
2 tbsp cornstarch
1/16 teaspoon salt
1 1/2 cups whole milk
3 ounces semisweet chocolate
1/2 teaspoon pure vanilla extract

Zest half an orange into ¼ cup sugar. With a fork, mash zest into sugar until well incorporated.

Combine orange sugar, cornstarch and salt in a heavy sauce pan. Slowly whisk in the milk. Heat over low heat, scraping the bottom and sides occasionally with a heat proof spatula. Use a whisk as necessary should lumps begin to form.

When mixture is thick enough to coat the back of a spoon (10-15 minutes), add the chocolate. Continue stirring for about 2-4 minutes, until the pudding is smooth and thickened. Remove from heat and stir in vanilla.

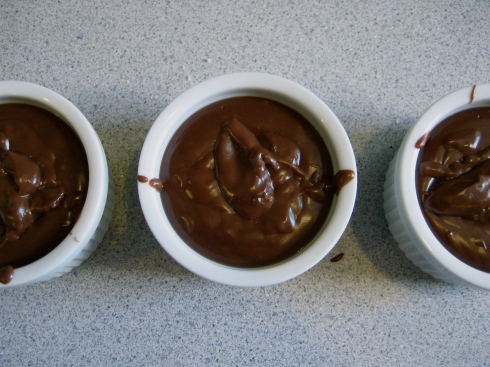
Strain pudding through a fine-mesh strainer (I didn’t actually do this, but that meant my pudding had pieces of zest in it, which wasn’t the best texture. I would recommend straining.) Pour pudding into three half-cup ramekins, or whatever serving dishes you are using.

Cover each dish with plastic wrap. If you don’t like skin on your pudding, be sure to press the plastic wrap against the top of the pudding. Refrigerate for at least 30 minutes, and up to 3 days.

Semi-Sweet Chocolate Cake with Vanilla Cream Filling and Chocolate Ganache Frosting

31 Jan

I spent a good while after moving to DC without having a close female friend in the city (I’m sure part of my problem was that I moved here with my boyfriend, so we tended to just hang out with each other rather than trying to make new friends).  My best friend from high school is all the way across the country, and my college friends are scattered between California, Seattle, and Boston. But luckily, about a year after I started working there, the firm I was at hired a particularly awesome girl and we quickly realized we had a lot of things in common (including our love of Liz Lemon and food.) I now consider her one of my closest friends, and this weekend was her birthday! I hosted a party for her at my apartment and spent the day making her a cake. I had emailed her a list of cakes I wanted to try making and told her to pick one for her birthday. She couldn’t decide, so I made an executive decision to make this particular cake, which is a recipe from the new Bon Appetit Desserts Cookbook.

This is a decadent chocolate cake, with unsweetened cocoa powder, semi-sweet chocolate and buttermilk in the batter. It was also a full days worth of work to get it done in time for the party. I woke up and baked the three layers before lunch, took a few hours break, and came back to tackle the filling, frosting and assembly.

The filling is whipping cream mixed with unflavored gelatin, so when you fill the cake it has the consistency of whipped cream, but after a few hours in the fridge, it firms up nicely. I got that lovely platter at a thrift store down the street from me for a smart $4. Love it. Please ignore the crack in my second layer…I almost dropped it. That’s why we frost cakes. So no one has to know about those almost-disasters that occurred in the baking process.

I had a really hard time not shoving my face into that Mountain of Deliciousness piled on top of the second layer. I managed to contain myself and focus on spreading the filling evenly.

I love that the filling is the same thickness as the cake layers. At first I was worried the cake would just smoosh down and the filling would all get squeezed out the sides, but everything turned out just fine!

This is what I like to refer to as a boatload of chocolate. Sixteen ounces of semi-sweet chocolate went into the ganache. It was at this point I had to chase my roommate out of the kitchen. Turns out I am really gullible, and at one point she said “Hey! Look out the window!” and I totally fell for it, looked out the window, and when I turned back she had a spoonful of ganache in her mouth, that little sneak.

The first layer of ganache goes on! The recipe has you put on two layers of cold ganache, then heat the remaining until it is pourable, and pour it over the cake for a beautiful, glossy finish. To make it extra fancy, I cut out a paper “M,” put it on top of the cake, then sifted cocoa powder over it. When you carefully remove the stencil, you have a gorgeous, professional looking cake for your guests to Ooo and Ahh over.

Moist, rich, truly decadent, and well worth the hours spent in the kitchen.